High Speed or Heavy Load? 7 Trade-Off Rules for Sizing Linear Modules
2025-12-15A Practical Checklist for Sourcing Linear Modules from China (That Engineers Actually Use)
2025-12-171. Start with Motion, Not with Catalog Pages
Before you pick a single model, write one clear sentence for your system:
“Move a ___ kg payload within ___ × ___ mm in X/Y and ___ mm in Z, in ___ seconds per cycle, with ±___ mm repeatability, in a ___ environment.”
Example:
“Move a 5 kg gripper over 600 × 400 mm in X/Y and 150 mm in Z, in 1.2 s per cycle, with ±0.05 mm repeatability, in a dusty machining cell.”
That single sentence already tells you:
- Overall envelope of your XYZ linear module platform
- Required stroke, speed and acceleration
- Precision level and environment (cleanroom vs oily shop floor)
Only when this is written down does “which 威洛博 W-ROBOT linear module should I pick?” become a meaningful question.
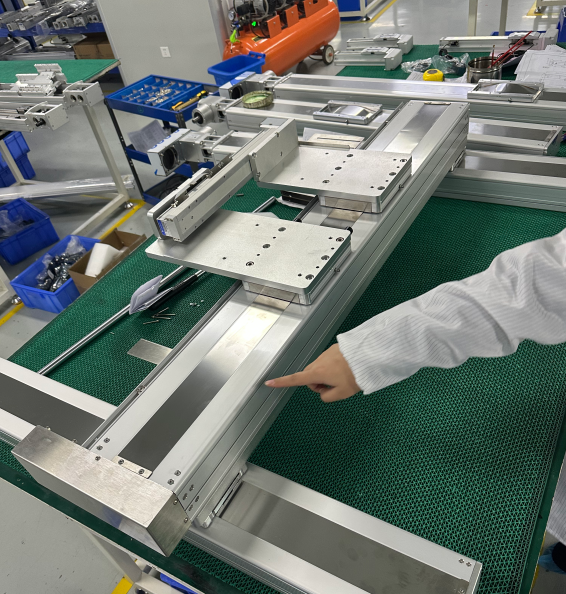
2. Step One: Choose the Base Axis for Your Platform
Think of the base axis as the “floor” of your multi-axis system. Everything else bolts to it.
2.1 Decide the dominant direction and stroke
Ask:
- Is your main motion horizontal (X) or along the conveyor?
- How long is the maximum required stroke?
- Will the base be fixed on a frame, or bridging over a working area?
For shorter strokes (say up to ~800 mm) where accuracy matters, a screw-driven W-ROBOT linear module is usually the best base. For long transfer strokes (1–3 m) where throughput is more important than microns, a belt-driven module is a better starting point.
2.2 Screw vs belt as the foundation
Very simplified:
- Ball-screw base
- Higher stiffness and repeatability
- Great for precision assembly, vision inspection, fine positioning
- Timing-belt base
- Longer stroke, higher speed, lighter moving mass
- Ideal for shuttling parts between stations, pallet handling, wide gantries
You can still build a multi axis linear actuator on either; what changes is the character of the whole system: “precision platform that can move fast” vs “fast platform with decent precision”.
3. Step Two: Add the Second and Third Axis the Right Way
Now you have one W-ROBOT linear module as a base. The temptation is to grab two more and stack them in the CAD. Resist that urge for a moment and think structure.
3.1 Building an XY gantry
For many applications—panel handling, large PCB inspection, PV glass movement—your first goal is a two-axis gantry:
- Base X axis: one or two parallel W-ROBOT linear modules
- Cross-beam Y axis: shorter stroke axis mounted on top, carrying the tool or Z stage
Key details:
- If the payload is high or spans a wide frame, use two synchronized X axes under the beam, not one central rail. This increases torsional stiffness dramatically.
- Make sure both base modules use the same type of linear guide rail and profile so they share loads evenly.
- Use coupling shafts or electronic gearing in the controller to keep the two X carriages aligned.
Done right, this XY setup becomes a rigid base for an eventual Z axis and turns into a true XYZ linear module platform.
3.2 Adding Z without breaking everything
The Z axis is where many DIY multi-axis builds go wrong. Common mistakes:
- Oversized Z module making the moving mass too large
- Undersized Z module flexing under gripper or spindle load
- Forgetting about brakes or counterbalance for vertical motion
Guidelines:
- Pick a compact, screw-driven W-ROBOT linear module or electric cylinder for Z. You want stiffness and gravity holding, not raw speed.
- Check allowable moments: the Z axis will carry a gripper, spindle, or camera with some offset. Make sure the catalog’s Mx/My/Mz ratings cover your worst-case lever arm.
- If the payload is significant, choose a motor with a holding brake or add a mechanical counterbalance to avoid crashes during power loss.
At this point, you have a coherent multi axis linear actuator rather than three unrelated axes bolted together.
4. Step Three: Stiffness, Alignment and Mounting Matter More Than You Think
You can pick the right models and still end up with a shaky machine if you mount them poorly.
4.1 Treat the frame as part of the axis
A W-ROBOT linear module is only as stiff as what you bolt it to.
- Use machined mounting surfaces or precision extrusions where rails sit.
- Avoid shims and random brackets unless you have a clear alignment strategy.
- For gantries, use a proper cross-beam with known deflection under load, not just “some convenient profile”.
If you’re building over a long span, ask your supplier for deflection data and recommended support spacing. That single conversation saves many hours of “why does it vibrate at 1.5 m/s?”.
4.2 Align the rails before you power up
Misalignment between two parallel axes will:
- Increase running friction
- Cause binding at high speed
- Shorten linear guide rail and screw life
Basic best practices:
- Use loose alignment (dowel pins, jigs, laser tools) to position rails before tightening.
- Move the carriages through full stroke by hand while tightening screws in stages.
- Only then install motors and commission drives.
It sounds boring. It’s also the difference between a smooth XYZ linear module platform and one that eats bearings for breakfast.
5. Step Four: Don’t Forget Cables, Hoses and Safety
As soon as you have three axes, cable management stops being a detail.
5.1 Plan cable carriers from day one
In the 3D model, reserve:
- Space for cable chains on each moving axis
- Bend radii that respect motor, encoder, and sensor cable limits
- Paths for pneumatics or vacuum lines to grippers or tools
A neat mechanical layout can still fail if the cable chain collides at the corner of your multi axis linear actuator or if a hose drags across the work area.
5.2 Think safety and maintenance access
Ask yourself:
- Can an operator reach common wear parts without dismantling half the gantry?
- Are there obvious pinch points where a hand or sleeve might get caught?
- Do you need covers or light curtains for larger systems?
Multi-axis systems are productive, but they also amplify risk if not guarded properly.
6. Step Five: Controls – Make It Feel Like One Machine, Not Three Axes
Mechanically, you now have a solid stack of W-ROBOT linear modules. To get value out of it, the control system must treat them as one organism.
6.1 Choose how you coordinate axes
Options:
- Central motion controller with all axes on the same bus
- Smart drives with internal interpolation for small systems
- PLC + motion card if you’re in a more classic industrial stack
For typical XYZ work—vision inspection, pick-and-place, simple machining—a compact motion controller that can run synchronized multi-axis moves is often the sweet spot.
6.2 Use standard kinematics and naming
Don’t get clever:
- Call axes X, Y, Z consistently in software and documentation.
- Define a clear machine coordinate system and home positions.
- If you build multiple machines, standardize conventions so service and software teams don’t have to relearn them.
The goal is for your XYZ linear module platform to feel like a single, coherent product to everyone who touches it: engineers, operators, and service.
7. When to Ask 威洛博 W-ROBOT for Help Instead of Doing It All Yourself
You don’t have to design every bracket and beam from scratch. On wlbrobot.com you’ll find:
- Model data and CAD for different W-ROBOT linear module families
- Examples of XY and XYZ combinations used in gantries and platforms
- Technical support that has seen most of the mistakes above already
If you know your motion envelope and payload, it’s often faster to let their engineers propose a baseline multi-axis configuration and then adapt it, rather than starting from a blank screen.